Como saben, en las últimas semanas he estado trabajando en dos proyectos que me tienen muy entusiasmada. Han sido días atareados, sin embargo han valido mucho la pena, y por fin ha llegado el momento de compartir el primero de ellos con ustedes, ¡qué emoción! Por supuesto, tomé muchas fotos como me lo pidieron 🙂
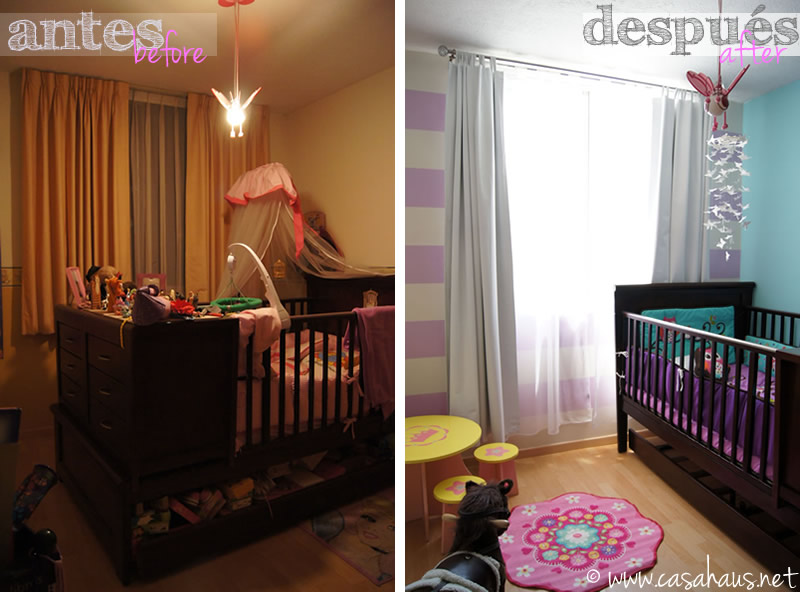
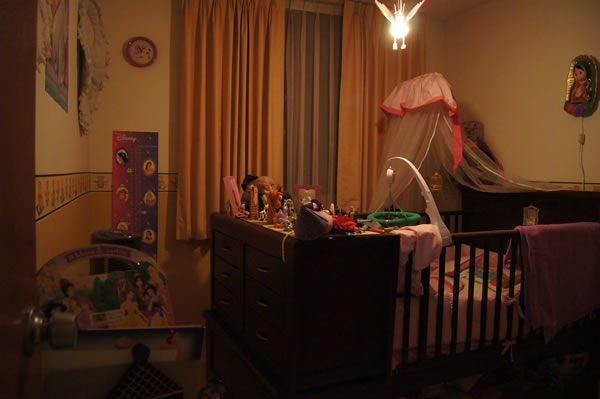
Este primer proyecto se trata del cuarto de una bebé que está por nacer en el verano. El espacio era originalmente la habitación de la hermanita mayor, y, como en la mayoría de nuestras casas, es muy chiquito: sólo 2.75 x 2.83 (escasos 7.80 m2). Veamos cómo lo transformamos con pintura, textiles, y algunos accesorios.
As you may be aware of, in the last couple of weeks I’ve been busy working on two projects I’m totally excited with. It’s been long days for us, but totally worth it, and now it’s finally moment to share them with you, yay! Of course, I took lots of pictures, as you asked me to 🙂
This first project I’m sharing is a little baby girl’s bedroom about to be born by Summer. It was originally the oldest sister’s room, and, as in most houses here in Mexico, it’s super tiny: almost 84 square ft. Let’s see how we transformed it with paint, fabric, and some accesories, shall we?
(Da click a las fotos para verlas más grandes/ Click on the photo for a larger view)
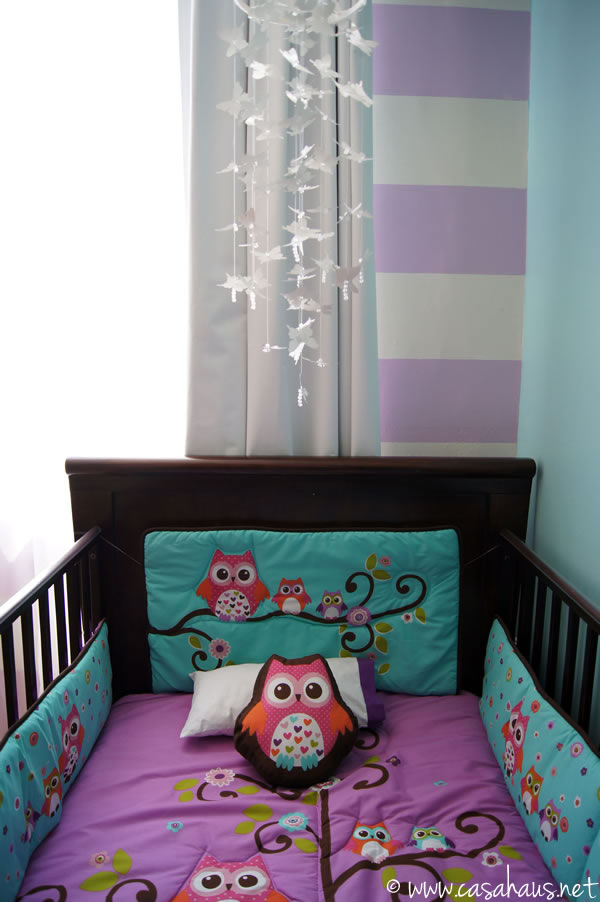
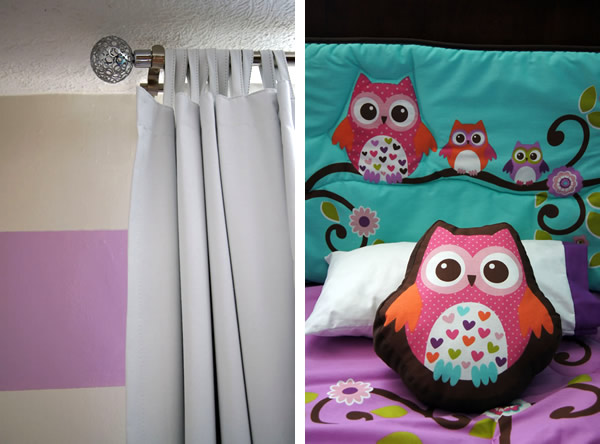
El punto de partida fue el juego de cuna Búho, del catálogo para bebés de Vianney. De ahí tomé los colores para las paredes: un aqua para la del fondo, y un lila bajito para las rayas, el resto se pintaron de blanco, para dar más amplitud al espacio, y ¡creo que nos funcionó de maravilla!
The starting point was the Owl bedding coordinate from Vianney baby. I chose the wall colors from there: a light aqua tone for the first one, and a light lilac for the stripes. The rest went white to make it feel larger. I think it worked!
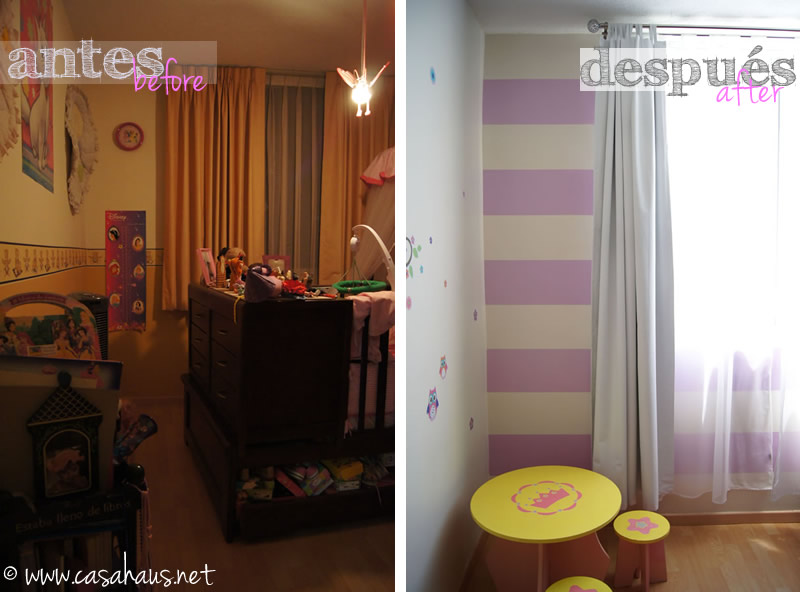
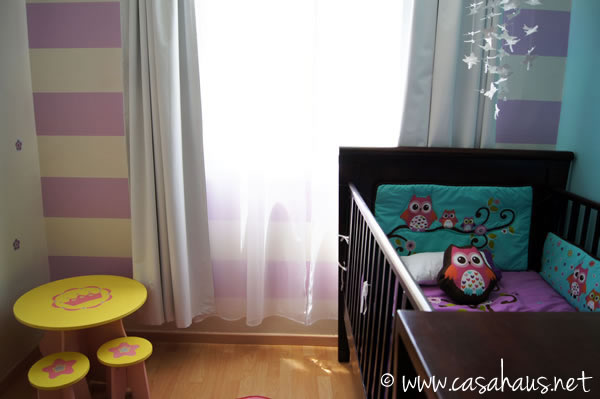
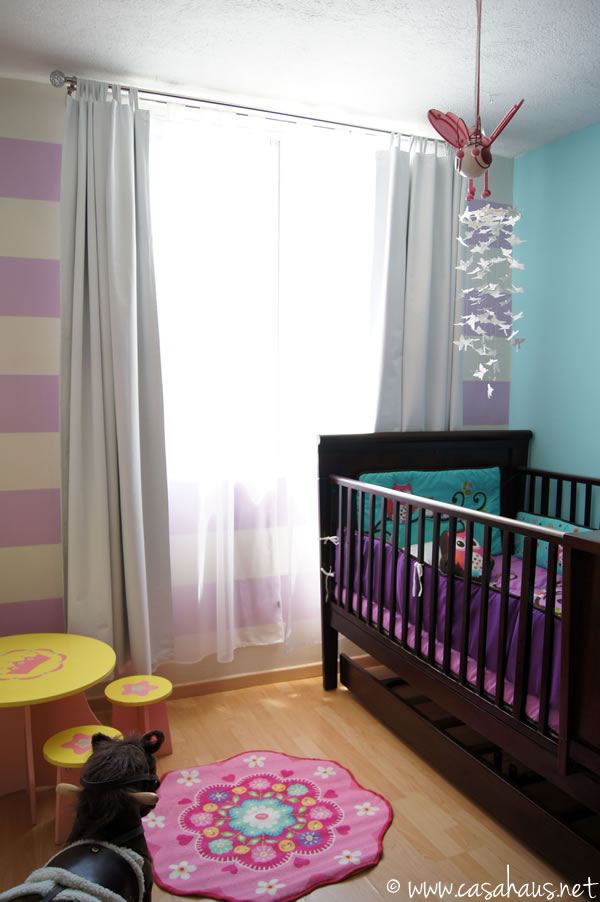
Después de pintar los muros, colgamos nuevas cortinas, también pensando en generar más sensación de amplitud. Las instalamos lo más alto que pudimos por dos razones: primero, para enfatizar la altura, que es muy buena (2.50m) y segundo, porque las ventanas no tienen cerramiento, sino que terminan donde empieza el techo. Y, siguiendo el tip que les conté la última vez, las pusimos un poco afuera de las ventanas, para que la ventana se viera más grande.
After painting the walls, we hung the curtains, also thinking about making the space feel larger. We installed them the highest we could for two reasons: first of all, to emphasize the good height of the room, and second, because the windows go all the way up to the ceiling. Following the tip I shared with you last time, we hung them a little wide, to make the windows look larger.
Escogí cortinas blancas, precisamente para que el espacio se sintiera amplio, además de que sabía que iban a verse muy lindas con la pared a rayas de fondo. Las cortinas traslúcidas son el modelo Tergal blanco. También pusimos cortinas con black out, para que el cuarto pueda oscurecerse cuando la bebé duerma, y son el modelo Black out blanco. La terminal tan linda es el modelo Melfi, todo de Vianney.
I chose white curtains because I wanted to keep adding to the sense of space, plus I knew they’d look extra cute with the stripes on the wall. The sheers are the model Tergal in white, and the others are the Blackout model in white, from Vianney. The finial and hardware is the Melfi model.
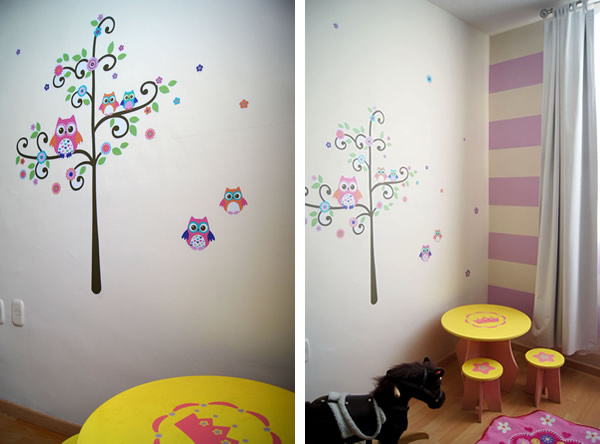
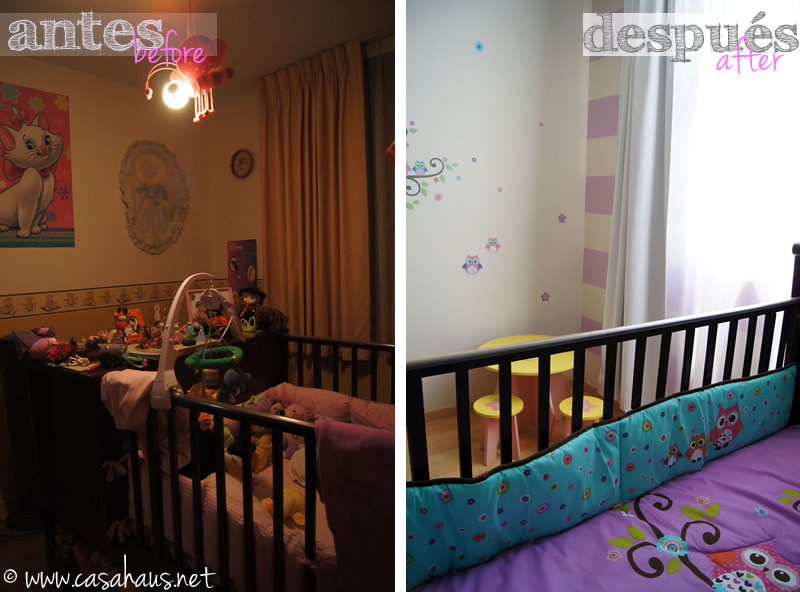
En la pared blanca pusimos el set de viniles Búho, a juego….
Then we added some decals…

…y el tapete Sweet, junto con una mesa y banquitos que ya tenían en casa.
…and a Sweet rug next to a table and tiny benches the owners already had.

La cuna la cambiamos de lugar, en vez de estar en el centro ocupando el poco espacio del cuarto, la pusimos a un lado, dejando la mitad de la habitación desocupada para las demás cosas. Por último, hice un móvil para la bebé de mariposas, inspirada en mi hermana que hizo lo mismo en el cuarto de su bebé. Mucha gente me ha preguntado cómo se hace, así que estoy preparando un post con el tutorial 🙂
A huge change was placing the crib to the side, leaving half of the room empty for the table and benches. Last but not least, I made a butterfly chandelier for the baby, inspired in the one my sister made for her baby’s room. Many of you have asked me how to make them, so I’m working on the tutorial 🙂
Sin duda, el trabajo valió la pena, pues a los futuros papás les encantó la transformación (y a mí también). El espacio ahora luce mejor y cuenta con más espacio para que las niñas jueguen y se diviertan, una vez que la bebé haya crecido un poquitín. 🙂 Como ves, aún los cuartos más chiquitos pueden convertirse en espacios hermosos, como siempre soñamos.
¡Muchas gracias a Vianney, como siempre, por su apoyo!
There’s no doubt, the hard work was all worth it, for the future parents are happy with the makeover (and so am I). The room feels so much better, and it’s got more space for the girl’s to play and have fun.
Sigue mis aventuras de primera mano en Instagram 😉
]]>
Leave a Reply