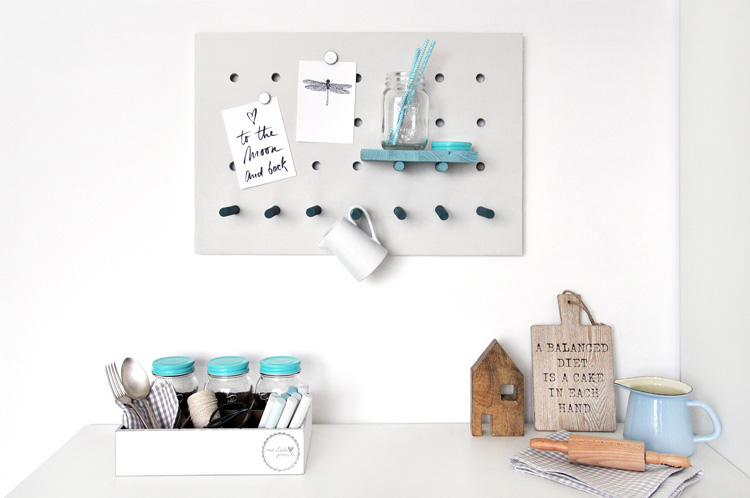
Como ustedes saben, me encanta hacer proyectos DIY (hazlo tú mismo), especialmente aquellos que son fáciles, útiles y bonitos. Constantemente estoy pineando ideas, sin embargo, cuando encontré el proyecto de hoy, supe que también tenía que compartirlo acá en en el blog. Se trata de un tablero perforado con palitos como soportes, el cual puede servir para prácticamente cualquier espacio en casa, ya sea para sostener las llaves y correspondencia en la entrada, colgar apuntes e imágenes lindas, organizar objetos en la oficina… todo con mucho estilo. Incluso es tan lindo, que hasta solito se ve bien.
As you know, I love DIY projects, especially those that are easy, useful and pretty. My “Inspiring DIY” board on Pinterest is ever growing, however when I discovered today’s project, I knew I wanted to share it right here, on the blog. It’s a DIY multitasking pegboard, which is perfect for organizing any space at home with lots of style, from holding the keys and mail in the entryway, to hanging notes and cute pics in your bedroom, or arranging your home office supplies… It even looks pretty all by itself.

La genia detrás de este DIY es Ioana, del blog Miss Red Fox, y me encanta cómo lo ha estilizado con diferentes objetos para ambientes distintos. Aquí les dejo algunos de mis favoritos:
The master mind behind this DIY is Ioana, from Miss Red Fox blog, and I love how she styled it differently, for all kinds of spaces. Here are some of my favorite:

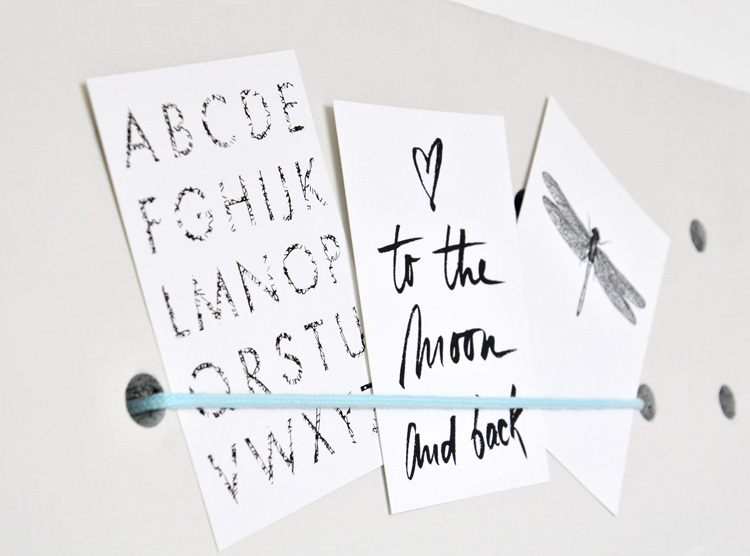


Lindo, ¿verdad?
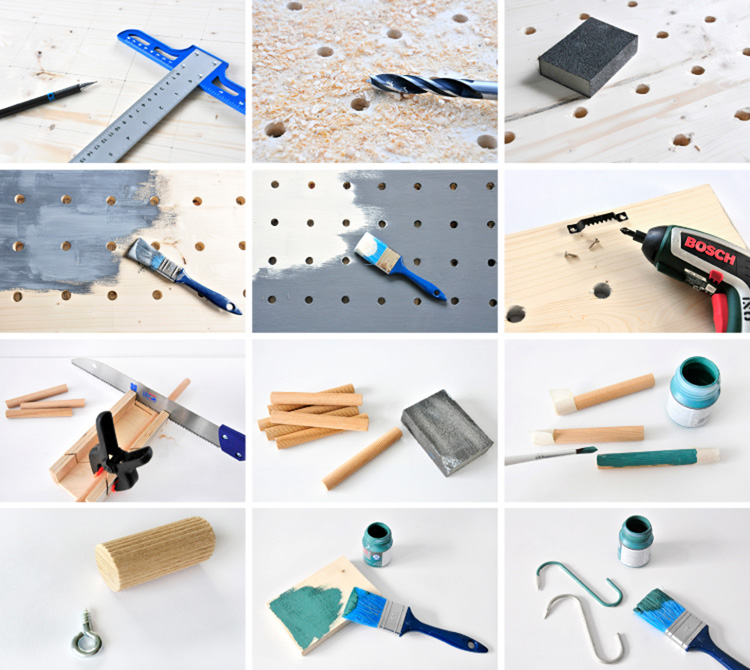
Para hacerlo, básicamente se necesita un tablero, un taladro y palitos de madera, además de pintura magnética (si quieres poder colgar imanes), ganchitos, hilos y demás accesorios que quieras usar para organizar tus cosas. Aquí les dejo el paso a paso visual, por si quieren intentarlo.
Cute, huh?
To make it, you need a board, driller and wooden sticks for the pegs, as well as paint (magnetic if you want to hang magnets), hooks, rings, yarn, and pretty much anything you want to use to organize your stuff. Here’s a visual step by step, in case you want to give it a try.
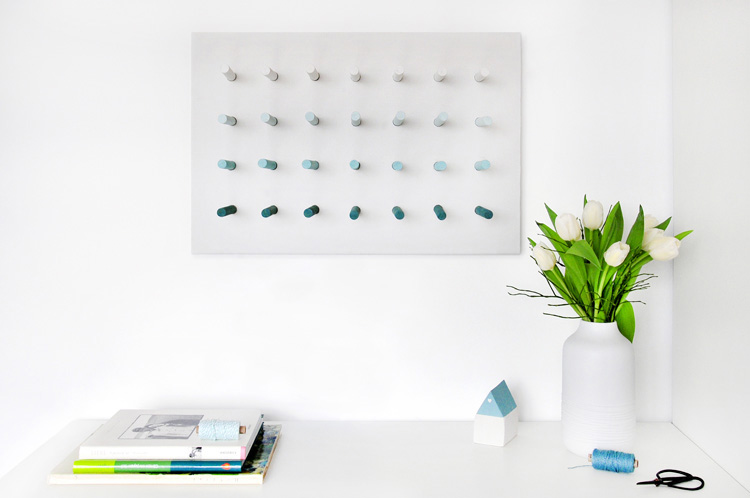
De verdad me encanta esta idea. Me fascina como Ioana pintó los palitos haciendo un ombré o degradado de tonos turquesa (aprende a hacerlo acá), así se ve lindo hasta sin colgarle nada, a modo de obra de arte moderna. Recuerdo que esta idea ya la había visto yo antes a modo de librero, usando palos gruesos para sostener las repisas, así que fácilmente se puede jugar con el grueso de las perforaciones y de los palos para hacerlos más delgados o más anchos (obviamente mientras más anchos, más peso pueden soportar).
Si a ustedes como a mí les gusta el DIY, recuerden que pueden ver más proyectos lindos y fáciles en el menú o dando click aquí.
¡Bonito día!
I really love this idea! I love how Ioana painted the sticks with an ombre effect (learn how to make the ombre effect here), so it looks cute even as wall art. I remember seeing this idea once before as a bookshelf, with thicker sticks to hold the shelves, so I’m guessing you can play with the thickness to have wider or thinner sticks and holes (obviously the thicker, the more weight they can hold).
If you like DIY as much as I do, remember you can see more projects clicking on the menu or here.
imágenes y proyecto: Miss Red Fox
Casa Haus en Instagram | Twitter | Pinterest | Facebook | Youtube
]]>
Leave a Reply